Soooo, I haven't exactly met my goal of posting more this year than last. On the one hand I am completely, 100% okay with this. This blog was always intended to be a fun project and not a chore, so when it's moved down on the priority list I've been totally fine with that. Some life events have also happened this year to contribute to the blog-less-ness. First, I started working full time again, thus leaving less time to loaf around coffee shops with my laptop. Why yes, I am a cliche. Thank you for asking. Second, I've started a new job. Twice. That's right, I started a new job around March then ended up leaving that job to start a new one in August. So there's been lots of general exhaustedness going around as I cram new job knowledge into by brain and get adjusted to the new schedule. Also, the first job included working weekends. So yeah.
On the other hand, I want to get back into a routine of posting at least once per week. I loved the 52 Tuesdays project as a way to stay with that schedule, but ultimately decided to take a break from it this year rather than making it an indefinitely ongoing series. That said, I miss posting about my thrifted goods! Hence, a new idea!! This idea is a combination of wanting to post more about second-hand finds, share their stories, and also add another element.
How do I say this...I like things. I get attached to them and like them for a really long time. I've been this way for, idk, my whole rememberable life I guess. As a wee girly I was super attached to all of my stuffed animals. They had names and I was very concerned about their feelings. Since most were gifts, it started with becoming instantly attached to them after the unwrapping process. It was like I was really being introduced to someone, and beyond that I had just rescued them from their packaging. I also used to rotate my "favorite" stuffed animal so none of their feelings would get hurt by not being given as much attention as the others. This may or may not be a symptom of only child syndrome...
I'm happy to say that as an adult I no longer think inanimate objects have feelings (phew). But I still really like things and particularly enjoy being surrounded by objects with meaning. I guess that's called being sentimental. Also, my taste doesn't change that much. There are lots of things that I've liked for a long time.
So now that I've rambled on for four paragraphs, let me introduce the first of a new series I'm calling "Long Loved Thrifts". The criteria are pretty simple. The item must have been purchased way, way back and still be in regular use. That is, in regular use and still loved. First up, this:
I can't remember exactly when I purchase this suitcase. Must have been high school at least if not earlier. I remember distinctly that I got it at St. Joe's Thrift Shop, which was my favorite thrift store for many, many years. I remember snapping it up immediately without a moment's hesitation. I mean, it's so good. Over the years I've used it for storage and for actual traveling. It fits perfectly in an overhead bin or even under the seat in front of you (insert my smug look as I watch the other passengers cramming their obnoxiously large roller bags into the bin). It also fits a surprising amount of stuff. I love this little guy. I doubt I will even get rid of it.
p.s. No offense to roller bag users. Of which I am one.
Sunday, September 28, 2014
Sunday, September 21, 2014
Long Weekend at Glacier National Park
Did you know that Glacier National Park is only about nine hours away from Seattle? We didn't. In my mind, Montana was super far away. As in, too far away to consider driving with less than a week of time to spare. Oh how wrong! Kevin was the one with the idea for this trip, and after looking up the travel time we decided to go for it.
I recently started a new job, and had approximately one week off in between ending my previous job and starting the new one. So, Kevin decided to take a Friday off and we headed out of town for a short long weekend to Glacier National Park. True, it would be better to have more time, and some may think it's too long of a drive for such a short timeframe, but it's ideas like those that sometimes keep you from enjoying the time that you do have in favor of waiting for some more ideal future time that may or may not arrive. In other words, we didn't want to put it off just because it wasn't ideal.
We ended up taking off on Thursday night and drove from Seattle to Spokane, which is a bit better than half way. We got in pretty late, but it was worth it to get the extra head start. Before heading out, we went for breakfast at Frank's Diner, which was lovely. Funny story, though. I had a bit of a misunderstanding with the menu and ending up ordering what was essentially scrambled eggs with two sunny side eggs on top. Yup. Eggs on eggs. Ah well.
We drove the rest of the way to Glacier pretty leisurely and got to our first camp at Fish Creek Campground in the early afternoon. Camp was set up and extra groceries and firewood were procured. And some obligatory huckleberry ice cream (they seem to have huckleberry everything in those parts). Then the weather started to turn a bit and we got some rain. However, we were able to start a fire before it got too wet out and spent the night quite comfortably wrapped in a wool blanket enjoying the fire despite the light rain.
Saturday was our full day of exploring. Since we only had limited time, we decided to focus on driving Going-to-the-Sun Road and only doing a few short hikes along the way. The weather wasn't the greatest (a trend for the whole trip), so we didn't get the best views driving along the road. There was a lot of fog and a little drizzle, but we still got glimpses of views here and there as the clouds shifted.

Once at the top, we did a short hike. Again, with intermittent views. I was pretty bummed that we didn't see any mountain goats - mostly due to fog - but we did get to see a marmot! It was just hanging out along the trail munching and not paying the slightest bit of attention to the passersby. I'd never seen one before and thought it was utterly adorable.
After the hike we drove the rest of Going-to-the-Sun Road, and were delighted to find that the other side of the pass was rain-free! We got some excellent both going down, and coming back through the second half of the road.

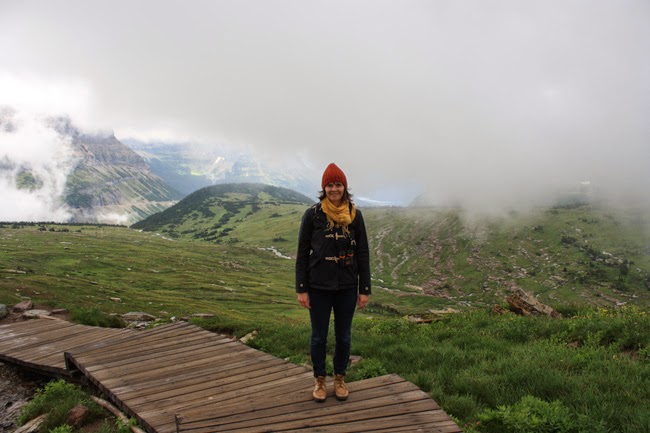
Saturday night we moved campsites to the larger Apgar camping area, once again were able to enjoy a fire (best part of camping!) and went to a ranger talk. We were so impressed with the ranger! She taught us all about the Whitepark Pine and it's symbiotic relationship with the Clark's Nutcracker. One super cool thing we learned about this particular bird is that once it harvest the pine nuts it hides them all around in little dug holes or caches. Then, it simply remembers were all it's caches are for later, and does a pretty good job of it too! In a world where we increasingly rely on technology rather than our good 'ole fashion memories I found this to be pretty cool.
Sunday was for packing up and heading out, as I started my new job on Monday morning and didn't want to cut it too close. The drive back was sunny and gorgeous, though, and the whole trip was worth the short amount of time we had. It was a good introduction to Glacier and we've now got lots of ideas for a next - hopefully longer - trip there.
I recently started a new job, and had approximately one week off in between ending my previous job and starting the new one. So, Kevin decided to take a Friday off and we headed out of town for a short long weekend to Glacier National Park. True, it would be better to have more time, and some may think it's too long of a drive for such a short timeframe, but it's ideas like those that sometimes keep you from enjoying the time that you do have in favor of waiting for some more ideal future time that may or may not arrive. In other words, we didn't want to put it off just because it wasn't ideal.
We ended up taking off on Thursday night and drove from Seattle to Spokane, which is a bit better than half way. We got in pretty late, but it was worth it to get the extra head start. Before heading out, we went for breakfast at Frank's Diner, which was lovely. Funny story, though. I had a bit of a misunderstanding with the menu and ending up ordering what was essentially scrambled eggs with two sunny side eggs on top. Yup. Eggs on eggs. Ah well.
We drove the rest of the way to Glacier pretty leisurely and got to our first camp at Fish Creek Campground in the early afternoon. Camp was set up and extra groceries and firewood were procured. And some obligatory huckleberry ice cream (they seem to have huckleberry everything in those parts). Then the weather started to turn a bit and we got some rain. However, we were able to start a fire before it got too wet out and spent the night quite comfortably wrapped in a wool blanket enjoying the fire despite the light rain.
Saturday was our full day of exploring. Since we only had limited time, we decided to focus on driving Going-to-the-Sun Road and only doing a few short hikes along the way. The weather wasn't the greatest (a trend for the whole trip), so we didn't get the best views driving along the road. There was a lot of fog and a little drizzle, but we still got glimpses of views here and there as the clouds shifted.

Once at the top, we did a short hike. Again, with intermittent views. I was pretty bummed that we didn't see any mountain goats - mostly due to fog - but we did get to see a marmot! It was just hanging out along the trail munching and not paying the slightest bit of attention to the passersby. I'd never seen one before and thought it was utterly adorable.
After the hike we drove the rest of Going-to-the-Sun Road, and were delighted to find that the other side of the pass was rain-free! We got some excellent both going down, and coming back through the second half of the road.


Sunday was for packing up and heading out, as I started my new job on Monday morning and didn't want to cut it too close. The drive back was sunny and gorgeous, though, and the whole trip was worth the short amount of time we had. It was a good introduction to Glacier and we've now got lots of ideas for a next - hopefully longer - trip there.
Saturday, September 20, 2014
Christmas Sweater Project - July Update
This post has been in draft status for waaaay too long. As usual, my knitting kept up behind the scenes while my posts did not. There will also be no August update since I didn't pick this baby up one bit in August. Another larger project came up (to be shared at some point) and this guy took the back burner. No worries, though, as I'm still on track to finish by December and am feeling confident that I will.
As predicted, I tore through the whole sleeve in July rather than splitting it up into July and August per the original timeline. This means the body and both sleeves were done on schedule and I was able to join and start working on the yoke in September. I'm very much looking forward to knitting through the yolk with all the fun colorwork. Wish me luck!
March - Knit 7" of body (half of 14")April - Finish last 7" of body to the armpitsMay - Make half of first sleeveJune - Finish first sleeveJuly - Make half of second sleeveAugust - Finish second sleeve- September - Join sleeves to body and start the yoke
- October - Finish the yoke
- November - Seaming, finishing, and blocking
- December - Wear it every friggin day
Saturday, September 6, 2014
Hawaiian Shirt Redo
Personally, I am loving the Hawaiian print trend that has been exploding this spring and summer. Bold, obnoxious prints in bright colors? Yes, please. More of that.
I absolutely fell in love with this shirt from a store that Kevin and I like to browse, but really couldn't justify the cost for such a "trendy" purchase. Or justify the cost in general since it's way more than I spend on clothes, like, ever. So, as usual, I started to browse for nice flowy, Hawaiian print shirts in lovely colors on my regular thrift store circuit, preferably in an all natural fiber like cotton or silk. I wasn't having a ton of luck when it dawned on me that there is typically no shortage of such thinks in the men's shirt department. Obnoxious Hawaiian print shirts are practically a staple for any daddy-o (including my own if I do recall correctly). I had the idea to look for one in a particularly suitable print and do a little switch-a-roo. In no time at all I had found a peach of a silk shirt in an extra-large size with plenty of fabric to mess around with. I'm not a great seamstress, but it was a pretty small investment so I figured why not. Here's a before shot:
The general idea was to take the back of the shirt and turn it into the front, and then use the two front pieces to make up the new back. I wanted it to be sort of loose with a flattering neckline and sleeves. All in all I'm very happy with how it turned out, although I'll admit I bumbled through it a bit. Therefore, although I'm going to list my steps below, I'd advise thinking of this more as a general idea-generating guide and less of a tutorial. Alrighty, here goes.
I started out by roughly deconstructing it. I knew I wasn't going to be super tight on fabric, so I simply cut the side seams and arm seams rather than taking extra time with a seam ripper. I also cut off and discarded the back yoke section and the collar. I was then left with just the large back piece, right front, left front, and two sleeves. I left the bottom hems and sleeve hems intact so that they could still function as the hems. Less sewing for me = good.
Then I ironed everything and laid out the back piece. I took a good fitting shirt of the desired shape from my closet and laid it out on top, matching up the bottom hem. I carefully traced around it with a washable fabric marker on the wrong side leaving about a 1/2 inch seam allowance. At this point I just skipped the arm hole part and only traced the side seams and top shoulder seams.
Then I cut out the pattern based on my tracing lines. To make sure things were symmetrical I folded the shirt in half and evened out the side seams. Then I sort of eyeballed and freehanded the armhole opening while it was still folded in half, so that I did both armholes at once.

Next up was the neckline. I laid the guide-shirt out again and traced as best I could. Then, I cut out the using the traced line, folded in half, and symmetrified it just like the body. My next step was to use a seam allowance tool to measure one inch all the way around the neckline. This was so I could cut slits a little bit less than one inch all the way around for the curved hem. After the slits were cut (you can barely seem them in the picture), I ironed around the curve at the one inch mark then sewed a simple straight stitch for the hem.
With the front of the shirt basically complete, it was time to move onto the two back pieces. I started by removing the button band parts from both sides then laying them out over the new front piece. I lined things up so that the bottom hems were flush and so that there was enough fabric to totally cover the front piece.
Then, I cut around the sides to match the front and was then left with these two pieces. At this point the bottom edges were finished, and the cuts were made for the outside seams and arm holes.
Next I had to figure out how to make the two pieces symmetrical with a seam right down the middle of the back, while still keeping the whole thing the same size as the front piece. So, I laid out the front piece with the two backs on top of it flush to the sides and bottom. Then, I measured the half way point and added one inch on each side for a wide seam allowance. Then I traced that one-inch-on-each-side-of-middle line directly onto the fabric, unstacked everything, and cut along that line. To finish, I sewed up the middle line and had my two back pieces into one. The final step was to cut the neck hem by sort of free-handing the curve to be about an inch and a half higher than the front.
For the sleeves, I again wanted to use the existing hem for the end of the sleeve. So, I basically took the detached sleeve tube and laid it out under my guide shirt sleeve to get an idea of how long it should be and marked that approximate spot. Then I laid the sleeve tube out under the new shirt by the sleeve hole so that the armpit matched up with the place I had marked. Next I used the rotary cutter to freehand a curve the would fit into the sleeve opening.
I had thought the sleeve might need a little adjustment to fit together perfectly, but it turned out great the first time. I fit the sleeve into the sleeve pocket right-sides-facing and pinned all along the opening. Then it was a quick run through the sewing machine to attach the sleeve and I was done!
I did make a really stupid mistake when cutting the sleeves that I couldn't undo. When I cut them, I put the original underarm seam up towards the shoulder, rather than at the underarm. So, the sleeve seams sits on my shoulder rather than under the arm. I was pretty bummed with I realized my mistake, but in the end it gave the sleeves a sort of dolmon-esque quality and looks pretty good.
Here's the final product!
I absolutely fell in love with this shirt from a store that Kevin and I like to browse, but really couldn't justify the cost for such a "trendy" purchase. Or justify the cost in general since it's way more than I spend on clothes, like, ever. So, as usual, I started to browse for nice flowy, Hawaiian print shirts in lovely colors on my regular thrift store circuit, preferably in an all natural fiber like cotton or silk. I wasn't having a ton of luck when it dawned on me that there is typically no shortage of such thinks in the men's shirt department. Obnoxious Hawaiian print shirts are practically a staple for any daddy-o (including my own if I do recall correctly). I had the idea to look for one in a particularly suitable print and do a little switch-a-roo. In no time at all I had found a peach of a silk shirt in an extra-large size with plenty of fabric to mess around with. I'm not a great seamstress, but it was a pretty small investment so I figured why not. Here's a before shot:
The general idea was to take the back of the shirt and turn it into the front, and then use the two front pieces to make up the new back. I wanted it to be sort of loose with a flattering neckline and sleeves. All in all I'm very happy with how it turned out, although I'll admit I bumbled through it a bit. Therefore, although I'm going to list my steps below, I'd advise thinking of this more as a general idea-generating guide and less of a tutorial. Alrighty, here goes.
I started out by roughly deconstructing it. I knew I wasn't going to be super tight on fabric, so I simply cut the side seams and arm seams rather than taking extra time with a seam ripper. I also cut off and discarded the back yoke section and the collar. I was then left with just the large back piece, right front, left front, and two sleeves. I left the bottom hems and sleeve hems intact so that they could still function as the hems. Less sewing for me = good.
Then I ironed everything and laid out the back piece. I took a good fitting shirt of the desired shape from my closet and laid it out on top, matching up the bottom hem. I carefully traced around it with a washable fabric marker on the wrong side leaving about a 1/2 inch seam allowance. At this point I just skipped the arm hole part and only traced the side seams and top shoulder seams.
Then I cut out the pattern based on my tracing lines. To make sure things were symmetrical I folded the shirt in half and evened out the side seams. Then I sort of eyeballed and freehanded the armhole opening while it was still folded in half, so that I did both armholes at once.
Next up was the neckline. I laid the guide-shirt out again and traced as best I could. Then, I cut out the using the traced line, folded in half, and symmetrified it just like the body. My next step was to use a seam allowance tool to measure one inch all the way around the neckline. This was so I could cut slits a little bit less than one inch all the way around for the curved hem. After the slits were cut (you can barely seem them in the picture), I ironed around the curve at the one inch mark then sewed a simple straight stitch for the hem.
With the front of the shirt basically complete, it was time to move onto the two back pieces. I started by removing the button band parts from both sides then laying them out over the new front piece. I lined things up so that the bottom hems were flush and so that there was enough fabric to totally cover the front piece.
Then, I cut around the sides to match the front and was then left with these two pieces. At this point the bottom edges were finished, and the cuts were made for the outside seams and arm holes.
Next I had to figure out how to make the two pieces symmetrical with a seam right down the middle of the back, while still keeping the whole thing the same size as the front piece. So, I laid out the front piece with the two backs on top of it flush to the sides and bottom. Then, I measured the half way point and added one inch on each side for a wide seam allowance. Then I traced that one-inch-on-each-side-of-middle line directly onto the fabric, unstacked everything, and cut along that line. To finish, I sewed up the middle line and had my two back pieces into one. The final step was to cut the neck hem by sort of free-handing the curve to be about an inch and a half higher than the front.
For the sleeves, I again wanted to use the existing hem for the end of the sleeve. So, I basically took the detached sleeve tube and laid it out under my guide shirt sleeve to get an idea of how long it should be and marked that approximate spot. Then I laid the sleeve tube out under the new shirt by the sleeve hole so that the armpit matched up with the place I had marked. Next I used the rotary cutter to freehand a curve the would fit into the sleeve opening.
I had thought the sleeve might need a little adjustment to fit together perfectly, but it turned out great the first time. I fit the sleeve into the sleeve pocket right-sides-facing and pinned all along the opening. Then it was a quick run through the sewing machine to attach the sleeve and I was done!
I did make a really stupid mistake when cutting the sleeves that I couldn't undo. When I cut them, I put the original underarm seam up towards the shoulder, rather than at the underarm. So, the sleeve seams sits on my shoulder rather than under the arm. I was pretty bummed with I realized my mistake, but in the end it gave the sleeves a sort of dolmon-esque quality and looks pretty good.
Here's the final product!
first post
sewing
Monday, July 28, 2014
FO: Flame Orange Tinder
It's no secret that I love secondhand things. And I'm lucky enough to have found a friend in Seattle that loves them just as much. Dear Sarah. This is wonderful for many reasons, from epic dual thrift raids to just being able to discuss the various merits and past scores of treasure hunting. What's doubly lovely is that we have very similar taste. These two things combine to create what is essentially another thrifting "me" who is out there scoring for finds even when I am not. As a result, there are often little lovelies left outside our door on any given day that seem to have appeared there by magic, or handed off in person accompanied by a very amusing "find" story.
The yarn for this sweater was just one such find. If I am not mistaken, Sarah found it at a thrift sale associated with the Pacific Northwest Needle Arts Guild and just couldn't help but scoop up the entire bunch. A move I very much approve of and would have certainly done myself. She then presented about ten skeins of it to me to do with as I wished. It's a lovely vintage 70's wool in the most obnoxious shade of flame orange. I refuse to call it by any other name, including the most obvious sportsman-friendly color. If you know what I mean (and I think you do).
I have to admit, I was at first a little skeptical of the color. It's so, so, so bright! In a good way...but I wasn't sure about it for a whole, one-color sweater, especially in this weight. I was originally thinking of combining it with a grey for a stranded, color-work yoked type sweater. But as I thought about it more and more I decided to just go for it. I started to envision a longer coat-style sweater with a textured stitch pattern and a funnel neck collar. I also found these lovely leather buttons at an antique store that paired wonderfully with the yarn.
After some pattern searching I found Tinder. Perfect. The only thing I didn't like about the pattern was the fact that it was knit in pieces and seamed. I HATE seaming, especially when it can be easily avoided. So, I did some simple maths (can't remember exactly what, but if you're interested I'm happy to count stitches and share) and went forward with knitting the left front, back, and right front all in one piece to the underarms. I then worked the pieces separately to the neck, still keeping a two knit stitch "seam" on the sides. The sleeves were also knit in the round to the underarm, then worked flat.
I'm thrilled with how it turned out and took advantage of the small stretch of chilly days we've had recently to wear it a few times. I also feel like this sweater was a big accomplishment for me because it's right in line with my goal of knitting more sweaters this year and doing it properly. I did the most legit gauge swatch of my life with this sweater and it paid off 100%. No re-knitting, tearing out, or over-vigorous blocking required. Which is a first I think. Here's to finally becoming a proper sweater knitter!
For the detail oriented...
Yarn: Brunswick Germantown, 100% wool, worsted weight
Pattern: Tinder by
Needles: Size 6 for ribbing, Size 7 for body and sleeves
Summary of Modifications: Fronts and back worked in one piece to underarms, sleeves knit in the round. Two inches of length added to arms, yo + k2tog buttonholes.
Raveled here.
These pictures were taken on Alki Beach on a beautiful evening. I couldn't help but snap a few pictures of the skyline, which I now cannot help but share:
Tuesday, July 8, 2014
That Time We Went to Vegas
This was super long ago, but I haven't shared any photos here yet - and there are some real gems - so I've decided to post now. A few months back Kevin had a work conference in Las Vegas and I decided to tag along. I've been to Vegas once before with my family in the 90's. I didn't know it at the time, but we were Midwestern victims of the wiles of the now somewhat defunct Family Vegas campaign. Of course we stayed at the Excalibur, rode every roller coaster on the strip, and spent our money at M&M world. I distinctly remember seeing a poster advertising Michael Jackson's show and remarking, "who is that?" to my parents. In hindsight, WHY DID WE NOT SEE MICHAEL JACKSON!!
While I do have very fond memories of our family trip to Vegas, I was also looking forward to going back as an adult. Because everything's different when you go back as an adult. Both because you get to re-see something you saw as a kid - which makes it feel familiar - but also because it feels new at the same time. Also, this was Kevin's first time visiting Las Vegas, which made it fun.
Here's some things we did, as taken by our phone cameras and organized here in list fashion:
1. Got things started off right with some beers on the plane. And knitting for me of course. Pros of drinking on the plane: your flight goes super fast and it's soooooo fun. Con: the needs of my super small bladder.
2. Relived a childhood memory with the around-the-world tasting tray at Coca-Cola World. So, so, so much sugary syrup. Still a fun little stop.
3. Visited the Neon Museum! Way cool. Highly recommended. Not only do you get to see fabulous retired signage but you also get to learn lots about Vegas history. It's a pretty small place, but they've got some real gems. We went during the day because a nighttime visit wasn't going to work with our schedule, and it was still really cool to see the signs. Here are a few of my favorites:

4. Held true to our travel philosophy of late by seeking out as many diner-style eateries as we could find, preferably ones that are open 24 hours. Vegas had some real winners. First up, Tiffany's Cafe. I have to quote this article from The Guardian, which I found in my diner researching and which pretty much sold me on this place and describes it perfectly, "no amount of hipster irony can prepare you for a place so utterly out of time." No disappointment there! Next up was the Peppermill. After visiting the Neon Museum, this place was like...well...a second Neon Museum. So much neon. The menu is great, too, with lots of classic dishes (think marshmallow salad) and absolutely the most gigantic banana split you've ever seen.
5. Selfies on The Deuce. Alongs with some really great eavesdropping and people watching. Ironically, I tried to take my coffee (in a lidded travel cup mind you) on the bus one morning and the driver turned me away. Really, Vegas?!?! I can guzzle a cocktail on the street but can't take my completely sober self on the bus with a coffee in my hand? This town is backwards.
6. Me doing lots of this during the day while Kevin was at the conference. The weather was hot but too hot, which was a welcome surprise.
7. And finally....walking the Strip with my very own pina colada slush in the best leg cup ever.
Not pictured is our endless wandering through just about every casino on the strip. We didn't end up gambling...not really on purpose, but just because it was a short trip and we were well occupied with other things. The photo booth in the arcade of our hotel, New York New York. Fremont Street. The wasted brunch we had at EAT in downtown Las Vegas (Not that it was bad, but, why did we go to a place that's just like every brunch place in Seattle?? Thanks Sunset magazine). A super fun comedy show at The Laugh Factory that was a lucky pick from a last-minute Groupon purchase. And probably lots of other little things I'm now forgetting....
All in all, a successful first trip to Las Vegas. We'd hit it up again for sure.
Monday, June 23, 2014
Christmas Sweater Project - May/June Update
Welp, it's been awhile.
Luckily, I have been keeping up with my knitting despite (or possibly as a result of?) not keeping up with my blog posts. I'm calling this one a May/June combined update. I had originally planned to knit only half of the first sleeve in May, then finish it up in June. Why I planned so much time for a single sleeve is now unclear. It's such easy stockinette that I powered through the whole thing without really realizing it about half way through May. No matter, though, and I haven't touched this project in June at all but have focused on others instead. Maybe because I knew I was ahead of schedule and maybe because I was just feeling really into making progress on other things (more on that later).

So, here it is! Body and first sleeve. Check and check. I plan to cast on the second sleeve this coming week and will most likely just knit the whole thing without interruption again like I did with the first. It just feels silly to set it down half-sleeve-way through. Plus, then I'll leave myself more time for the yoke, which might end up taking more time then budgeted. And if it doesn't then this will be the first project I've ever finished before it's deadline!! Wait, that's not entirely true. I made a handful of project for my good friend Lindsey while she was still pregnant with her adorable son Levi that were don waaaaay ahead of her due date. But I think baby projects don't count because they're so cute and quick that it's impossible to stop knitting them. And then make three pairs of wee baby socks when you had planned to make one because wee socks are just about the cutest thing ever (see here and here)
I've mentioned that I've been knitting this Christmas sweater along with two other projects and decided I should provide some photographic evidence of this. From the top down we've got a super special traditional-ish Aran sweater I've been working on for Kevin, a flame (I refuse to say blaze) orange waffle-stitch cardigan for me, and the Christmas sweater. They are all in different states of completion and I love them all at once.
Here's the list of accountability with some very satisfying strikethroughs...
Luckily, I have been keeping up with my knitting despite (or possibly as a result of?) not keeping up with my blog posts. I'm calling this one a May/June combined update. I had originally planned to knit only half of the first sleeve in May, then finish it up in June. Why I planned so much time for a single sleeve is now unclear. It's such easy stockinette that I powered through the whole thing without really realizing it about half way through May. No matter, though, and I haven't touched this project in June at all but have focused on others instead. Maybe because I knew I was ahead of schedule and maybe because I was just feeling really into making progress on other things (more on that later).
So, here it is! Body and first sleeve. Check and check. I plan to cast on the second sleeve this coming week and will most likely just knit the whole thing without interruption again like I did with the first. It just feels silly to set it down half-sleeve-way through. Plus, then I'll leave myself more time for the yoke, which might end up taking more time then budgeted. And if it doesn't then this will be the first project I've ever finished before it's deadline!! Wait, that's not entirely true. I made a handful of project for my good friend Lindsey while she was still pregnant with her adorable son Levi that were don waaaaay ahead of her due date. But I think baby projects don't count because they're so cute and quick that it's impossible to stop knitting them. And then make three pairs of wee baby socks when you had planned to make one because wee socks are just about the cutest thing ever (see here and here)
I've mentioned that I've been knitting this Christmas sweater along with two other projects and decided I should provide some photographic evidence of this. From the top down we've got a super special traditional-ish Aran sweater I've been working on for Kevin, a flame (I refuse to say blaze) orange waffle-stitch cardigan for me, and the Christmas sweater. They are all in different states of completion and I love them all at once.
Here's the list of accountability with some very satisfying strikethroughs...
March - Knit 7" of body (half of 14")April - Finish last 7" of body to the armpitsMay - Make half of first sleeveJune - Finish first sleeve- July - Make half of second sleeve
- August - Finish second sleeve
- September - Join sleeves to body and start the yoke
- October - Finish the yoke
- November - Seaming, finishing, and blocking
- December - Wear it every friggin day
Subscribe to:
Posts (Atom)